Tuesday, September 29, 2020

3D Art: Module Two Week Five


Game Asset Creation 101: Part One

This week, we created a proxy model of our crate and imported it into Unreal Engine 4.

My crate was based on these designs by Michael Guimont. I thought the crate with air holes could have a narrative element, like something had broken out of its container.


I scaled my crate to be pretty big. Then brought it into UE4, and then modeled my proxy model off of that.


I made sure I didn't have any ngons and did my UV layouts. For the modeling side of it I think I did too much for this stage, but I sort of got carried away with trying out boolean stuff, since I've never really used them before.


Thursday, September 24, 2020

Common Art: Week Four

 Use of Basic Lighting

For this assignment we set up a three-point lighting system in a Maya scene, and then rendered a few images using Arnold. We also needed to render our Lego figure.

I had more fun rendering the models we were given than rendering my Lego astronaut, since there was so little surface information compared to the busts. The colorization also ended up a little flat because of this. 


I'm glad to have a lighting set-up that I can use for future models.

Monday, September 21, 2020

3D Art: Module One Week Four

 Lego Project: Part 2

I ended up redoing the harness and helmet a little to make them closer to the accurate scale. Since I wanted to texture them too, I retopologized so that it was one contiguous mesh and then laid out the UVs.


Then I textured it in Substance Painter. I'm not super familiar with the software so I didn't do anything intense, but even if I could've, it might've been wasted on the low-poly mesh.


The Sequencer and Post Process Volume part of this was really great to learn, I didn't know you could do so much post-processing inside of Unreal.


For my second design, I couldn't really reconfigure the pieces too much, so I ended up posing the astronaut and trying to recreate the movie poster for Gravity. I couldn't get the aperture and focal length so that only the midground was in focus, and the motion blur and DOF option in the post processing volume didn't seem to do much either.


Thursday, September 17, 2020

Common Art: Week Three

Use of Value and Contrast

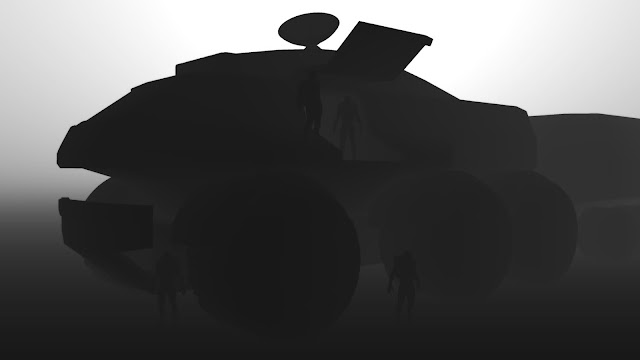
For this assignment, we were given maps rendered in Maya and had to layer them in Photoshop and create a 2d scene. The map I was most interested in was the Z Map: 

I'd never rendered or even heard of a Z Map before, and don't know what they're used for in a 3d context. But I thought the foggy look of it was interesting and kind of dramatic, so I wanted to use it.

I thought I could use the lighter portion of the map to make those regions look like they were glowing, like the interior and undercarriage of the vehicle were lit.


Grayscale:


Monday, September 14, 2020

3D Art: Module One Week Three

 Lego Project: Part 1

I ended up choosing the Lego astronaut to model. The chest piece had a lot going on, and I did my best to get the proportions right, although they aren't perfectly like the images.


I mostly used primitives, and for the cylindrical shape wrapping around his neck, I also used the Curve tool and extruded along it to get the shape. 


The astronaut only had two pieces besides the body, which I modeled after the sample Lego person in the Basic Bricks sample we were given.

The meshes still need work, though.


Thursday, September 10, 2020

Common Art: Week Two

 Use of Silhouettes

This was a fun assignment, and I see the benefit of using it as a concepting tool. I tried adding white lines in post, but thought that it looked worse than the plain black silhouettes, so I left them blank for the final image.

The issue is just my linework; it's not clean enough to add to the silhouettes. If I were stronger in 2d, though, I'd definitely like to add those details.

My final designs:

I also got images of the wireframe, just to show what was going on with the model.

Monday, September 7, 2020

3D Art: Module One Week Two

 Minecraft-ish Level

For this assignment, we made textures to use with the materials we were making in Unreal. I ended up with a dirt texture, a tree trunk texture, a water texture, and a leaf texture. For the dirt, tree trunk, and water I also wanted to add an emissive layer to it.

My original plan with the emissive was to export a targa file with the color information and an alpha to block out what I didn't want emissive. But I couldn't get it to work for whatever reason, so I separated out the alpha and used it separately, then multiplied the alpha and my diffuse texture together.

The parameter thing was an awakening for me; one thing that frustrated me about material instances was that I couldn't change certain things I wanted to and so I ended up just making a new material. I finally understand the usefulness of material instances. I made the diffuse and alpha texture a parameter, along with the emissive multiplier.

My idea was an island in the sky, and I collected a few references:


This is what I came up with.


Mannequin for scale


I learned during the last Unreal project that emissive materials don't actually produce light, so I added point lights along the surface of the waterfall and had the light color match the water's color.

Sunday, September 6, 2020

Technical Art: Homework Two

 Perforce/Engine Basics

I've imported things I've made into an Unreal scene before, so I was a little familiar with what to do. One thing that I hadn't ever dealt with before this project was the landscape. I found a landscape material that I liked; it was part of the Western Town project. I initially tried to migrate the entire landscape, but apparently the landscape doesn't really work like that. Instead I had to migrate the material instance and then make my own landscape in a new scene.

The master material was really intimidating to me:

Each of the Rock, Sand, Wetness, and Grass had a layer that could be painted onto the landscape. It also had some procedural stuff going on in the original level, but I didn't even know where to start with that. It was a desert landscape, which was what I wanted to go with the Fire Elemental that I'd gotten from another Unreal demo. It came with a few animations that I messed with, but because it came from a cinematic scene, they weren't looping.

The magma I migrated from another project was also animated.

The chair he's sitting on is a bench from the Bumping Pub scene, but made slightly narrower.

Initially I just wanted to make a desert/fire scene, and then I added some cages and the fire pit from the Bumping Pub and now it looks like this fire elemental might eat people.


Thursday, September 3, 2020

Common Art: Week One

 Use of Basic Shapes

I'm not that great at Photoshop or 2D stuff at this point, and definitely found myself relying on Maya as much as possible. For my references, I focused on two pieces by Sparth:


I wanted to model this ship, but I really liked the color scheme of the landscape, and wanted to use that for my reinterpretation.

I did my blockout:


And here's where I think I cheated: I rendered out a normal map, AO map, and a metal map and used them as layers in Photoshop. I used the AO as a Multiply and the reflective map as an Overlay. The normal map I used as my base color after messing with the hue and color balance.


I wish I had had more time to model some of the smaller structures and add more linework, but I think I learned a lot.