Friday, July 9, 2021

Common Art: Lighting Assignment

 The Corpse Bride Lighting Exercise

Our VR Team and the Corpse Bride VR team swapped scenes to light, and I chose the bar scene to light. I was trying to match the scene as much as I could, but I struggled with recreating the way certain lights lit the walls. I used a few light IES textures that I got from the Light Profile Pack on JR's account. There were also some green glow-y parts in the background in the movie scene that I tried to represent with green hued lights.

References:


UE4 images:


Tuesday, July 6, 2021

3D Art III: Portfolio Two Week Three

 Game-Res/UVs

So after critique last week, I got excited about this idea I had to make a fully-fledge environment, and wanted to dump a bunch of time into it to catch up this week.


But last Wednesday I had a few unexpected things come up that took up my time and had to back off the plan for the environment. I did already have some modular walkways and the beginnings of a trimsheet done though, so I can potentially continue at least with the trimsheet in the last week along with the tileable texture for the floor.


I also have first bakes done for the original prop.


I'm bummed that I won't really be able to get that entire environment done in one week, but I hope that what I have made I can integrate into a diorama somehow.

Sunday, June 27, 2021

3D Art: Portfolio Two Week Two

 High-Poly Sculpting


I tried to beat up the two models a little more. I also worked on the tileable texture and getting it working in engine.


I ended up running into an issue where the texture was getting stretched depending on the surface of the plane it was being applied to. So basically the wall had to be a perfect square for the texture to make sense.


I looked into it and saw that I could use a World Aligned Texture node to project the tileable texture onto the surface of the object rather than using the object's UVs. 


I ended up getting a seam in the texture because my document got a little messed up when I sculpted off the edge of the polygroup and distorted the edge. I'll have to go back and fix it, and since I'm not 100% sure about this texture after seeing it tiled, I'll probably redo a lot.

Week Three:

- Retopology and first bakes for the two props

- Finalize tileable texture

Saturday, June 26, 2021

VR: Summer Sprint Three

 Individual Contributions III

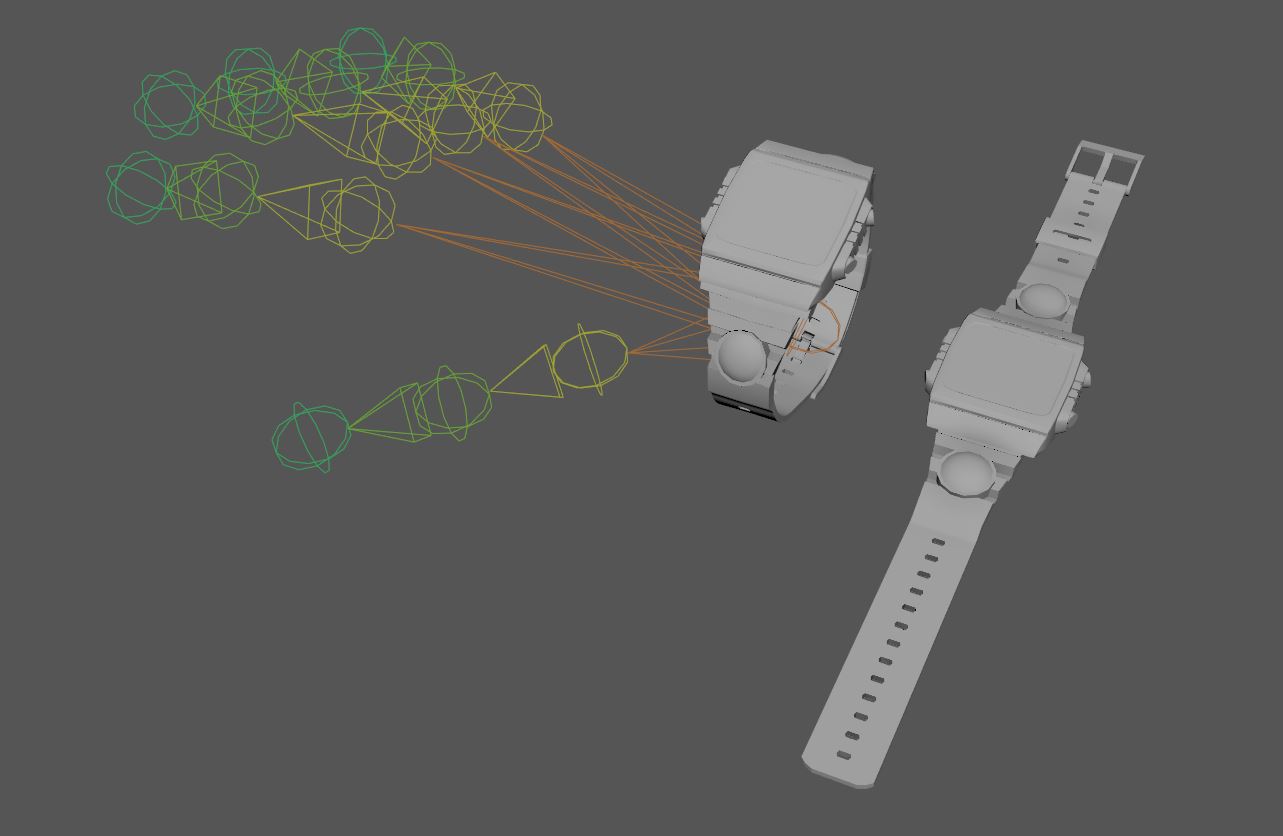
The hand ended up looking pretty polygonal in game, so I made a higher-res version and reskinned it to the mannequin hand skeleton. I also skinned the game-res watch after using the non-linear Bend deformer tool in Maya to wrap it around the wrist.


I later had to split the hand and watch, since I'd skinned them as a single mesh. I exported each as a separate skeletal mesh that both use the mannequin hand skeleton.

I also worked on getting the MetaHuman stuff into our project. I managed to finally get the retargeting to work properly. 

I ran into an issue where I was trying to mix and match parts of the different available MetaHumans from Quixel, adding them into a single BP, bringing that into our project, and then trying to retarget. The issue was that each piece was referencing a different (but identical) skeleton, and when I would retarget, the skeletal meshes that weren't from the original SampleMetaHumans project that came with the retargeting pose wouldn't acknowledge the retargeted animation.

There was another little thing that wasn't in Epic's documentation: in the skeleton tree of both the MetaHuman skeleton and the mannequin skeleton, I needed to go to options and check Show Retargeting Options, and then everything except the first to bones -- the root and pelvis -- needed to be set to Skeleton for their Translation Retargeting. The root and pelvis get set to Animation. Also, in the Set Up Rig options in the Retargeting Manager, the IK options on the mannequin (turn on Show Advanced) all get set to None for which bone they get mapped to. Retargeting was possible without this being set but it looked bad.


After getting all that figured out, we had several crashes when it was brought into the scene. Manny's also having issues with getting it to work with the line trace. Chris suggested just using a static pose of the MetaHuman instead, and we may end up having to do that.

Sunday, June 20, 2021

3D Art III: Portfolio Two Week One

 Redesigning Existing Meshes

I started out trying to just adjust the textures and see how that was looking. I made everything matte and removed any metalness and specularity, since I thought it took away from the stylized look. I also liked the toon shader effect and wanted to see about using that for my display of these.


But I think I still need to work on the textures, and to do that I think I need to add more sculpt information to the props. They've got mostly flat surfaces. I worked on the low-voltage station first, tweaking some of the parts and trying to make its silhouette more interesting.


I also recently had to re-texture the main character, so I'll probably try to use a similar approach to the props. For him, I used ambient occlusion in the diffuse layer, plus the curvature maps to add 'linework' basically to try to emphasize some of his sculpt information. 


Wednesday, June 16, 2021

3D Art III: Portfolio Two Part Zero

 Proposal

1. Revisiting Props I Made For Capstone

I have a few mechanical props that I made for Capstone that I don't wanna put on my portfolio yet. We had time constraints so I didn't get to refine them as much as I'd like. I'd like to do that for this project.


If possible, I'd like to develop the textures more too and try something hand-painted, like Lei Liao's work.


2. Darksiders Door


3. Darksiders 'Weeping Gorgon'


For both of the Darksiders pieces, I'd be aiming for Darksiders Genesis' artstyle.


Sunday, June 13, 2021

3D Art III: Portfolio One Week Four

 Finishing Game Res/Textures

I struggled a lot with trying to get this all retopologized, and relied on zRemesher for a few of the objects in the model. I was aiming for around 150,000, but my current polycount is 186,562.


First Bake:


(This doesn't really show off the model, but I thought this backlighting looked cool)


I ran into some issues with how I stacked the UVs of the corpses, so I had to re-adjust them so that corpses in similar poses would share UVs.


Textures and real-time render. I'm not super happy with it at the moment, but I'd like to continue working on this on the side, and eventually posing him.